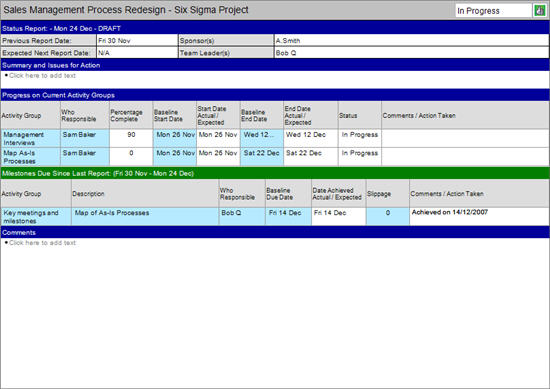
Swiftlight’s status reporting functionality allows you to quickly and easily produce a standard Status Report commenting on progress and any issues in your project. An example of a Status Report template is shown below:
Status Reports can be created from the File > Reporting menu.
Before you create your first report, you will be asked to set project baseline dates, which are the dates of Activity Groups and Milestones in your original plan (i.e. the baseline plan when you started the project). With the baseline dates set, you can look at and report on how you are currently doing relative to your baseline in Timeline review mode and through the Status Reports.
Status Reports can be used by themselves or in combination with outputs from other views (e.g. Timeline in review mode, Activity Group Summary, Issue Log, etc.) to provide a rich set of materials for reporting.
When the Status Report is saved, either in draft or final form, all the changes made in the Status Report are carried through to the rest of the file (e.g. changes to Activity Group start / end dates are reflected in the Timeline, Activity Group Detail views etc).
Creating a Status Report is very simple. Follow the steps below:
On selecting Reporting > New Status Report, after an introductory screen, you will see the dialogue below:
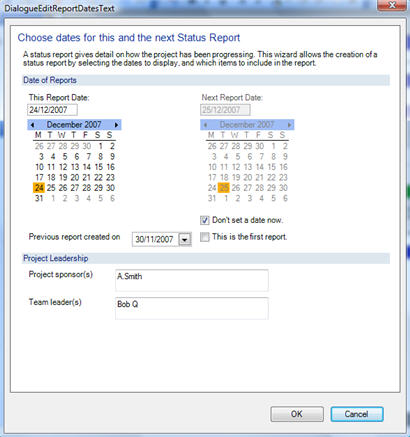
In this dialogue you can:
When you are satisfied with your selections, click on the “Next” button to get to Step Two. Note: you can always come back to edit your selections later.
: you will now see the dialogue below, in which you can choose the Activity Groups that you want to report on.
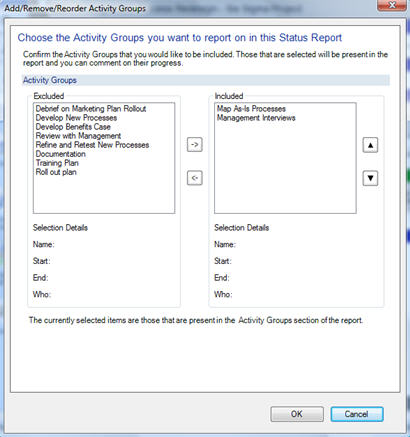
The right hand “Included” box shows Activity Groups that Swiftlight has pre-selected for inclusion in the Status Report, based on the fact that the Activity Group is either underway, or should have been completed since the previous Status Report. The left hand “Excluded” box lists all the other Activity Groups.
If you click to select an Activity Group in either the “Included” or “Excluded” boxes, then various details on it appear underneath (e.g. its name, start and end dates and who is responsible).
To move an Activity Group from “Included” to “Excluded” (or vice versa), select it and then either double click on it, or click on the relevant arrow between the two boxes.
You can also change the order in which “Included” Activity Groups will appear in the Status Report by selecting them and using the arrows to the right of the box to move them up or down.
When you are satisfied with your selections, click on the “Next” button to get to Step Three. Note: you can always come back to edit your selections later.
: you will now see the dialogue below, in which you can choose the Milestones that you want to report on.
There are two sections in this dialogue: 1) at the top, for “Due / Achieved Milestones” that were due to be completed between the dates of the last and the current Status Report; 2) at the bottom, for “Upcoming Milestones” that will fall due before the expected date of the next report.

The right hand “Included” boxes show Milestones that Swiftlight has pre-selected for inclusion in the Status Report, based on their dates and the dates of the previous, current and future Status Reports (if any). The left hand “Excluded” boxes list all the other Milestones. If you click to select a Milestone in either the “Included” or “Excluded” boxes, then various details on it appear underneath (e.g. its name, when it was / is due, who is responsible, and to which Activity Group does it belong).
To move a Milestone from “Included” to “Excluded” (or vice versa), select it and then either double click on it, or click on the relevant arrow between the two boxes.
You can also change the order in which “Included” Milestones will appear in the Status Report by selecting them and using the arrows to the right of the box to move them up or down.
When you are satisfied with your selections, press “Finish” to open up the Status Report template, which you can then go on to update and complete.
After clicking on “Finish”, the Status Report template will appear populated with the Activity Groups and Milestones that you have selected. You can now update the data, add comments etc as needed.
If you want to edit your selections of Activity Groups or Milestones (or the report dates, project sponsor(s), team leader(s)), you can use the right click menus (illustrated below) to get back to the set-up dialogues. If you right click over the Activity Group section of the Status Report, you get the dialogue below.
In this right-click menu:
If you right click over the Milestone section of the Status Report, you will get a similar dialogue to the one above, but with an option to “Add / Remove / Reorder Milestones” which will open up the dialogue in Step 3 of the “New Status Report Dialogues” and allow you to update your selection of Milestones.
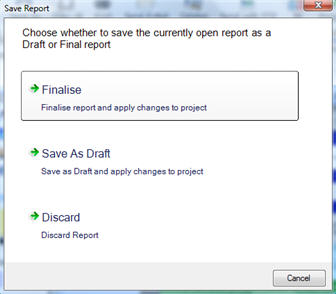
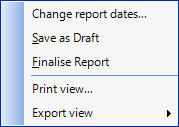
When you have completed your edits to the Status Report, you can use the right click menu to save the report as a draft or to finalise it, or you can click on the icon for another view (e.g. to move to the Timeline), in which case the dialogue below opens up which allows you to finalise the report, save it as a draft, or discard all changes.