This view provides a summary table of information about the Activity Groups.
In addition to the Activity Groups that you have added to your project, there is also a "Key Meetings and Milestones" Activity Group that runs for the duration of the project (from the start of the first Activity Group to the end of the last Activity Group) and contains all the Meetings and Milestones in the Key Meetings or Key Milestones sections of the Timeline.
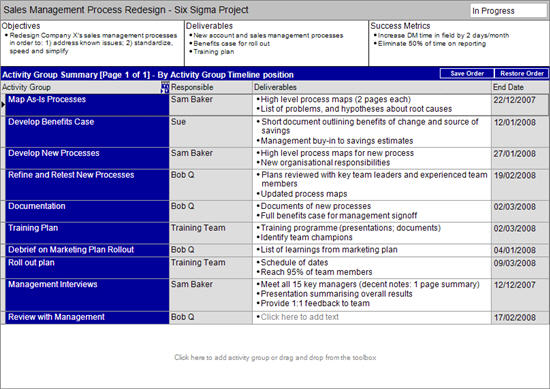
Up to twelve* categories of information about each Activity Group can be selected for display in the table:
Budget, Comments, Responsibility, Percentage Complete, Performance, Activity Group Start Date and Activity Group End Date are not on by default – they can be selected using the Page Body format dialogue (* while all 12 categories can be displayed, the table may get crowded and it is generally better to select a smaller set of categories to suit the needs you have at the time).
The colours in the left hand column default to dark blue for all Activity Groups, but can be made to match the Activity Group colours on the timeline through using Page Body format dialogue
There are a number of ways of adding new Activity Groups into the Activity Group Summary table:
The order of the Activity Groups in the table can be arranged in a number of ways:
To sort by a particular order either click on the header of the column you wish to sort by or use the Sort dialogue (from menu: Page Layout > Sort > Sort Dialogue). When the table has been sorted in this way, adjacent rows with the same value in the sorted column are all coloured the same (white or grey) and the text is merged across those table cells.
In addition the Activity Groups can be sorted in the order that they appear in the Timeline (each row from top to bottom then from left to right) by clicking on the Activity Group column header until the "By Timeline" icon appears.
To arrange in your own custom order, individual rows can be moved up and down using:
The menu (Page Layout > Move > …) OR
Note: you can also select multiple rows and move them together.
Once you have arranged the rows in the order you would like this order can be saved using the Save Order button at the top of the table.The Restore Order button will allow you to recover the last saved order.
Individual rows in the view can be hidden using the right-click menu (or from the toolbar) so that you can choose what to share with others.